Pssst.
Want to know one of my deepest, darkest secrets? Until this year, I haven’t organized my personal photos since 2012…it feels so good getting that out in the open! Don’t get me wrong, I have been keeping my professional images well organized however my own family images have sadly been neglected. We all have those moments, right! When the thought of doing something that we know we should feels overwhelming, and before you know it days, weeks or years have gone by. Did you know that researcher’s say you will improve your quality of life by 99% if you do the thing that you have been procrastinating? Actually, I made that up, but I am sure there are stats somewhere to support the concept that we all feel better once we get that deep dark secret off our to-do list.
If you’re not in the same situation as I am, with years of photos to sort through (I’ve only sorted one year since January), then you probably should consider writing a book similar to one of the books that I mention at the end of this step-by-step guide. But if you’re like me, keep reading, get inspired, and start small with a deadline that is reasonable. Life is busy, and the idea of sifting through thousands of pictures can seem like a task best left for “another day.” But taking the time to organize your photos can be incredibly rewarding. The forgotten captures and the different perspectives a photo reveals once the years have passed do slow the process down, but in an amazing way.


This guide will walk you through practical steps to effectively organize your photo storage and provide some valuable resources to help you along the way.
What You Will Need:
– A Computer: For storing, sorting, and organizing your photos.
– External Hard Drive: For backing up your photos. Consider a solid state drive.
– USB Cables: To connect your phone and camera to your computer.
– Memory Card Reader: If your camera uses a memory card.
– Photo Management Software: Such as Adobe Lightroom, Apple Photos, or Google Photos.
– Duplicate Photo Cleaner Software: Like Duplicate Cleaner or Gemini 2.
– Cloud Storage Accounts: Options like Google Photos, Apple iCloud, Amazon Photos, or Flickr.
– Time and Patience: Organizing photos is a marathon, not a sprint!
Step 1: Gather All Your Photos
First things first, gather all your photos in one place. Since your computer may not have enough space to store all your photos, consider using a new external hard drive. Here’s how you can do it:
- From Your Phone: Connect your phone to your computer using a USB cable or transfer photos wirelessly using a cloud service like Google Photos, Apple iCloud, or Dropbox. Save them directly to the external hard drive.
- From Your Camera: Use a USB cable or a memory card reader to transfer photos from your camera to your computer, then move them to the external hard drive.
- From Your Computer: Consolidate photos from various folders on your computer by copying them to the external hard drive. Check your default photo directories and any other places where you might have saved pictures.
- From Cloud Storage: Download photos from your cloud storage accounts. Most services allow you to download your photos in bulk, making the process easier. Save these downloads directly to the external hard drive.
- From Other External Hard Drives: If you have other external hard drives with stored photos, connect them to your computer and copy all the photos to your new external hard drive. This will make it easier to sort and organize them.
Having all your photos in one spot will make it easier to sort and organize them. Imagine the satisfaction of seeing all your memories in one place!
Step 2: Sort by Date
Next, sort your photos by date. Most digital photos have metadata that includes the date the photo was taken. Use this information to create folders by year and month. For example, you can create folders labeled “2020,” “2021,” and so on, with subfolders for each month. It might sound tedious, but you’ll love the trip down memory lane.
Step 3: Create Themed Folders
After sorting by date, it’s time to create some special events or categories subfolders. For example, you could have folders for “Vacations,” “Birthdays,” “Family Gatherings,” and “Pets.” This additional layer of organization will make it easier to find specific photos later on. Plus, it’s like curating mini photo albums!
Step 4: Back Up Your Photos
Before diving into detailed organization, back up your photos. Use an additional external hard drive or a reliable cloud storage service to create a backup. This ensures that your photos are safe in case of any accidental deletions or technical issues. Think of it as your digital insurance policy.
Step 5: Delete Duplicates and Unwanted Photos
Now comes the satisfying part—deleting duplicates and unwanted shots. There are several software tools available that can help identify duplicate photos, such as Duplicate Cleaner or Gemini 2. Removing these will free up space and make your collection more manageable. Say goodbye to blurry photos and near-identical shots!
Step 6: Tag and Label Your Photos
Adding tags and labels to your photos can significantly improve your ability to search and find specific images. Most photo management software, like Adobe Lightroom or Apple Photos, allows you to add tags, labels, and even geotags to your photos. Consider creating a consistent tagging system that works for you and stick to it for all future shots as well. Tagging will help you easily find photos to add to your categorized subfolders for years to come!
Step 7: Regular Maintenance
Organizing your photo storage is not a one-time task. Set aside time regularly, such as once a month, to go through recent photos and organize them according to your system. If you’re anything like me, adding an event on my phone helps with accountability and ensures I set time aside on a regular basis. This habit will prevent your photo collection from becoming overwhelming again…hopefully!
How Google Photos Can Help
Google Photos is a powerful tool for organizing your photos, offering several features that can streamline the process:
- Automatic Backup: Google Photos automatically backs up your photos from your devices. Once set up, you never have to worry about losing your photos.
- Smart Organization: Google Photos uses AI to organize your photos by date, location, and even the people in them. It can recognize faces and group photos of the same person together.
- Search Functionality: The search feature in Google Photos is incredibly powerful. You can search by date, location, objects, and even types of events. For example, you can type “beach” and find all your beach photos.
- Shared Libraries: You can share your photo library with a trusted person, making it easier to share memories with family and friends.
- Editing Tools: Google Photos offers basic editing tools that allow you to enhance your photos without needing additional software.
- Free Storage: Google Photos offers 15GB of free storage shared across Google Drive, Gmail, and Google Photos. This is ample space for storing and organizing a significant number of photos.
By leveraging these features, Google Photos can simplify and enhance your photo organizing experience.
Free Photo Storage Options
If you’re looking to store your photos without spending a lot of money, there are several free photo storage options available.
- Google Photos: Offers 15GB of free storage shared across Google Drive, Gmail, and Google Photos. It also has a great search function and the ability to automatically organize photos by date and location.
- Apple iCloud: Provides 5GB of free storage. It seamlessly integrates with Apple devices and automatically backs up photos taken on your iPhone or iPad.
- Amazon Photos: For Amazon Prime members, unlimited photo storage is included with your membership. It offers high-resolution photo backups and easy sharing options.
- Flickr: Offers 1,000 free photo uploads. It also includes social features, allowing you to share and explore photos from other users.
These free options can help you keep your photos safe and accessible without the need for expensive storage solutions.
Books to Consider
To delve deeper into photo organization, consider reading:
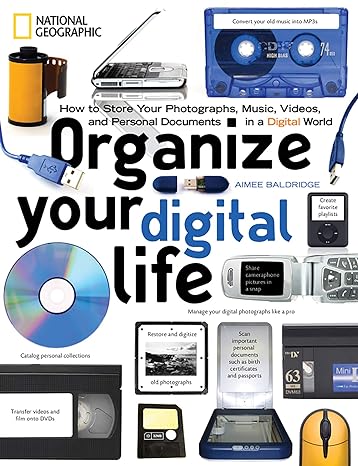
- Organize Your Digital Life: How to Store Your Photographs, Music, Videos, and Personal Documents in a Digital World by Aimee Baldridge – This book provides practical tips and techniques for managing all types of digital media, including photos.
- Photo Organizing Made Easy: Going from Overwhelmed to Overjoyed by Cathi Nelson – This book offers a step-by-step approach to photo organizing, with tips on everything from physical photo management to digital storage solutions.
Remember, organizing years of photos takes time, and that’s perfectly okay. It’s a process that requires patience and consistency so don’t be discouraged if it feels like a huge task at first. Take it one step at a time, and celebrate your progress along the way. The reward of having an organized photo collection is well worth the effort.
Organizing your photo storage can seem like a daunting task, but with a systematic approach and the right tools, it is entirely manageable. By following these steps and regularly maintaining your photo library, you’ll ensure that your memories are preserved and easily accessible. Remember to be patient with yourself during this process. Happy organizing!
Leave A Comment